Key Takeaways
- The first move for a leaking water heater is always the same: switch off power at the MCB, then shut the cold-water inlet valve. Never touch a wet geyser that is still switched on.
- Most leaks I see are not the tank itself, they come from loose inlet/outlet nuts, a worn safety valve, or the drain plug, all of which a careful DIYer can tighten or replace.
- A steady drip from the pressure-relief valve is often the valve doing its job, not a fault, but a valve that runs constantly needs checking.
- Water seeping from the body seam or the element flange usually means the inner tank has corroded, and that geyser is at the end of its life.
- Water plus electricity is a shock and short-circuit risk, so if you cannot find a dry, obvious cause, isolate the geyser and call a professional.
A puddle under the geyser or a brown drip mark down the bathroom wall makes most people panic, and I understand why, water and a live 2 kW appliance are not a friendly mix. But in the hundreds of geysers I’ve opened up over the years, a leak is far more often a five-minute fix than a dead tank. The trick is knowing where to look, and doing it in a safe order. By the end of this guide you’ll know how to make a leaking water heater safe, trace exactly where the water is coming from, fix the common leaks yourself, and recognise the one leak that means it’s time to replace the unit. If the leak turns out to be one symptom of a bigger fault, our complete water heater repair guide covers the wider picture.
First: make the leaking geyser safe
Before you inspect anything, remove the two things that make a leak dangerous, electricity and pressure. This takes under a minute and protects you from a shock while your hands are wet.
- Switch off the geyser’s dedicated MCB in the distribution board. Don’t rely on the wall switch alone.
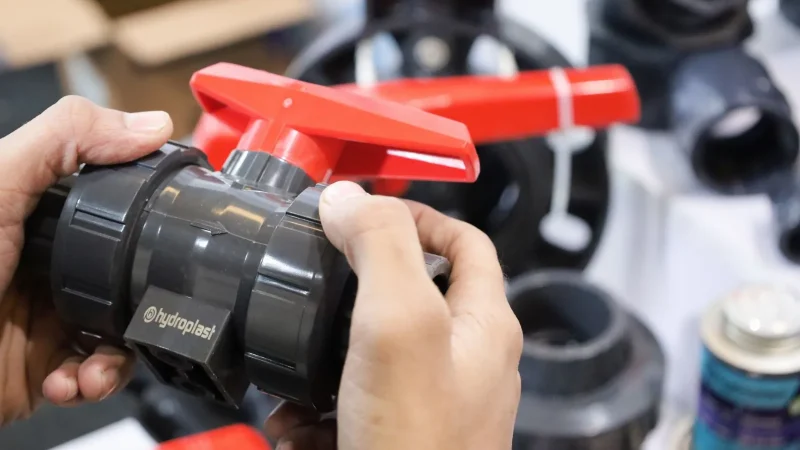
- Close the cold-water inlet valve (the small tap on the pipe going into the geyser). This stops fresh water feeding the leak.
- Open a hot tap somewhere in the house to release pressure in the tank and lines.
- Wipe the area dry and place a bucket or old towel to catch further drips while you investigate.
Warning: If you can see water dripping onto or near the geyser’s wiring, terminal cover, or the wall switch, do not touch the unit. Switch off the MCB from a dry position and call a licensed electrician. Wet live wiring is the one situation where DIY stops.

Find out where the water is actually coming from
A wet geyser tricks you, water travels along the body and drips from the lowest point, which is rarely where it started. Dry the whole unit with a cloth, then watch for two minutes to see where the first fresh bead appears. Here are the usual culprits, roughly in order of how often I find them.
| Leak location | Likely cause | DIY-fixable? |
|---|---|---|
| Inlet/outlet pipe nuts (top or side) | Loose union, worn washer, bad tape | Yes |
| Pressure-relief / safety valve outlet | Normal expansion release or a stuck valve | Often |
| Drain plug at the bottom | Loose plug or perished seal | Yes |
| Element / thermostat flange | Failed gasket or corroded flange | Sometimes |
| Body seam or bottom of the outer casing | Inner tank corroded through | No, replace |
Knowing the source changes everything. A dripping nut is a nuisance; water weeping from the seam of the casing is a funeral. Take your time on this step, it saves you from replacing parts that were never the problem.
Is it a leak, or just condensation?
Not every wet geyser is leaking. In a humid bathroom, a cold inlet pipe or a cool tank surface can sweat, leaving a film of water that looks alarming but is harmless. The way I tell them apart is simple: wipe everything bone dry, then run the geyser for a heating cycle and watch. Condensation forms as an even, misty film across a surface and doesn’t grow into a running drip. A real leak produces a bead that reappears at one specific point and slowly runs. If the “leak” only shows in peak humidity or during monsoon and never forms a running drip, you’re probably chasing sweat, not a fault. Water heating is basic physics here, warm tank, cool room air, moisture condenses, and a quick note on how water heating works makes the difference obvious.
Fix 1: Leaking inlet or outlet connections
This is the leak I fix most. The threaded joints where the flexi-pipes or GI pipes meet the geyser loosen slightly over time, especially with the daily heat-and-cool cycle, and the old thread tape gives up.
- With power and water off, place a bucket underneath.
- Hold the pipe steady with one spanner and gently tighten the nut with another. A quarter-turn is often enough, don’t force it.
- If tightening doesn’t stop it, unscrew the joint fully, clean the old PTFE tape off the threads, and wrap 5 to 7 turns of fresh tape in the direction of the thread.
- Reconnect, tighten firmly by hand plus a nudge with the spanner, then restore water and check before switching power back on.
Tip: Over-tightening cracks plastic geyser inlet spigots more often than it stops leaks. Snug plus a small nudge is the target. If a joint still weeps after fresh tape and a firm tighten, the fitting or washer is worn, replace it rather than cranking harder.
Fix 2: A dripping pressure-relief (safety) valve
The multi-function or pressure-relief valve is designed to release a little water when the tank heats and the pressure rises, so an occasional drip during a heating cycle can be completely normal. The problem is a valve that drips constantly or streams.
- Occasional drip while heating: usually fine, but fitting a small drain hose to route it away keeps the wall dry.
- Constant drip: often grit under the seat. Lift the valve’s test lever for a second to flush it; if it still drips, replace the valve.
- Heavy, continuous flow: could mean mains pressure is too high or the valve has failed. Don’t block or plug it, that is dangerous. Fit a new rated valve or get the inlet pressure checked.
The safety valve is doing a genuinely protective job, so I never tell anyone to cap or seal it. If you want to understand exactly why it matters, the deep dive on pressure-relief valves is worth a read.
Fix 3: A leaking drain plug
The drain plug or nut at the base can weep after a flush or on an older unit where the seal has hardened. With the geyser isolated and depressurised, remove the plug, clean the threads, wrap fresh tape or fit a new washer, and refit snugly. If the plug’s plastic is cracked, replace the plug, not just the tape.
Fix 4: Weeping around the element or thermostat flange
If water appears from the removable plate where the heating element and thermostat sit, the flange gasket has likely failed, sometimes after a descaling job that was reassembled with an old or misaligned gasket. This one is borderline DIY.
- Drain the tank fully first, or you’ll have a flood.
- Remove the element plate, replace the rubber gasket with the correct size, and clean both mating faces.
- Tighten the flange bolts evenly, a little on each in turn, so the gasket seats flat.
If the flange itself is pitted with rust, a new gasket won’t hold for long. At that point you’re looking at the tank’s health, which brings us to the leak nobody wants.
The leak you can’t fix: a corroded tank
When water seeps from the outer casing seam or drips from the very bottom of the body with no fitting nearby, the inner tank has almost certainly corroded through, usually because the sacrificial anode rod was never replaced and hard water finished the job. There is no reliable patch for a rusted-through pressure vessel.
Trying to seal it with putty or a clamp is throwing good money after bad, and a pressurised tank that fails can spill its whole volume. If you’ve reached this point, weigh a replacement using our guide on whether to repair or replace your water heater. Nine times out of ten, a leaking tank means replace.
Stopping the next leak before it starts
Most of the fitting leaks I’m called out for were avoidable. A few habits keep the joints and tank healthy for years.
- Replace the anode rod on schedule. The sacrificial anode rod is what rusts instead of your tank. Once it’s spent, the tank starts corroding, and that’s the leak you can’t fix. In hard water, check it every couple of years.
- Don’t ignore hard-water scale. Scale makes the element and tank run hotter and stresses the seams. A yearly flush and descale in hard-water areas protects the whole unit.
- Fit an isolation valve on the inlet. It lets you shut water to the geyser alone, so a future leak is a controlled fix, not a house-wide shut-off.
- Get the mains pressure checked if the safety valve keeps releasing, high pressure ages every joint and the tank itself.
A little prevention here is the difference between a bathroom that stays dry and a geyser that dies early. The tank’s inner lining and anode do the quiet work, so keeping them in good shape is the single best defence against leaks.
When to stop and call a professional
DIY has clear limits with a leaking geyser. Call a licensed plumber or electrician if any of these apply.
- Water is reaching the wiring, terminal box, or wall switch.
- The leak is from the tank body or seam, not a fitting.
- The safety valve streams even after cleaning and replacement.
- The geyser also trips the ELCB or MCB, this is a sign water has reached live parts. If yours trips, our guide on the first things to check when a geyser is not working and the full troubleshooting checklist will help you describe the fault clearly to the technician.
Frequently Asked Questions
Is a leaking water heater dangerous?
It can be, mainly because water and the geyser’s electrical parts are close together. A leak that reaches wiring or trips the ELCB is a genuine shock risk. Switch off the MCB, shut the inlet valve, and don’t touch a wet, powered unit.
Why is my geyser dripping water from the bottom?
Dry the unit and watch closely. If the drip starts at the drain plug or a pipe nut, it’s a fitting you can tighten or reseal. If water weeps from the casing seam with no fitting nearby, the inner tank has likely corroded through and the geyser needs replacing.
Can I fix a leaking geyser myself?
Often, yes. Loose inlet or outlet nuts, a worn drain-plug seal, and a grit-stuck safety valve are all safe DIY fixes once you isolate power and water. A corroded tank or water reaching live wiring is not DIY, that needs a professional and usually a new unit.
Why is water dripping from the geyser safety valve?
A little water from the pressure-relief valve as the tank heats is normal, it releases expansion pressure. A constant drip usually means grit under the seat, flush it with the test lever. A continuous stream points to high inlet pressure or a failed valve that needs replacing, never plug it.
How much does it cost to fix a leaking water heater?
A fitting or valve repair by a plumber is usually modest, often around ₹300 to ₹800 for labour plus the part, depending on your city. A corroded tank can’t be repaired economically, so that becomes the cost of a new geyser and fresh installation instead.
The takeaway on geyser leaks
A leaking water heater looks scary but usually isn’t fatal, most leaks are a loose joint, a tired seal, or a valve doing its job. Isolate power and water first, find the true source before touching a spanner, and match the fix to the cause. The only leak worth mourning is one from the tank body itself. If you’re unsure where a leak sits or it comes with other faults, browse the rest of our geyser repair guides or call a professional, a dry bathroom and a safe geyser are always worth the caution.